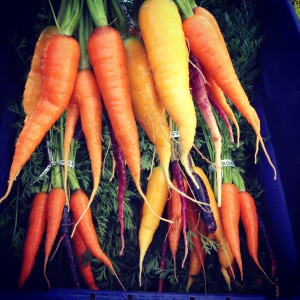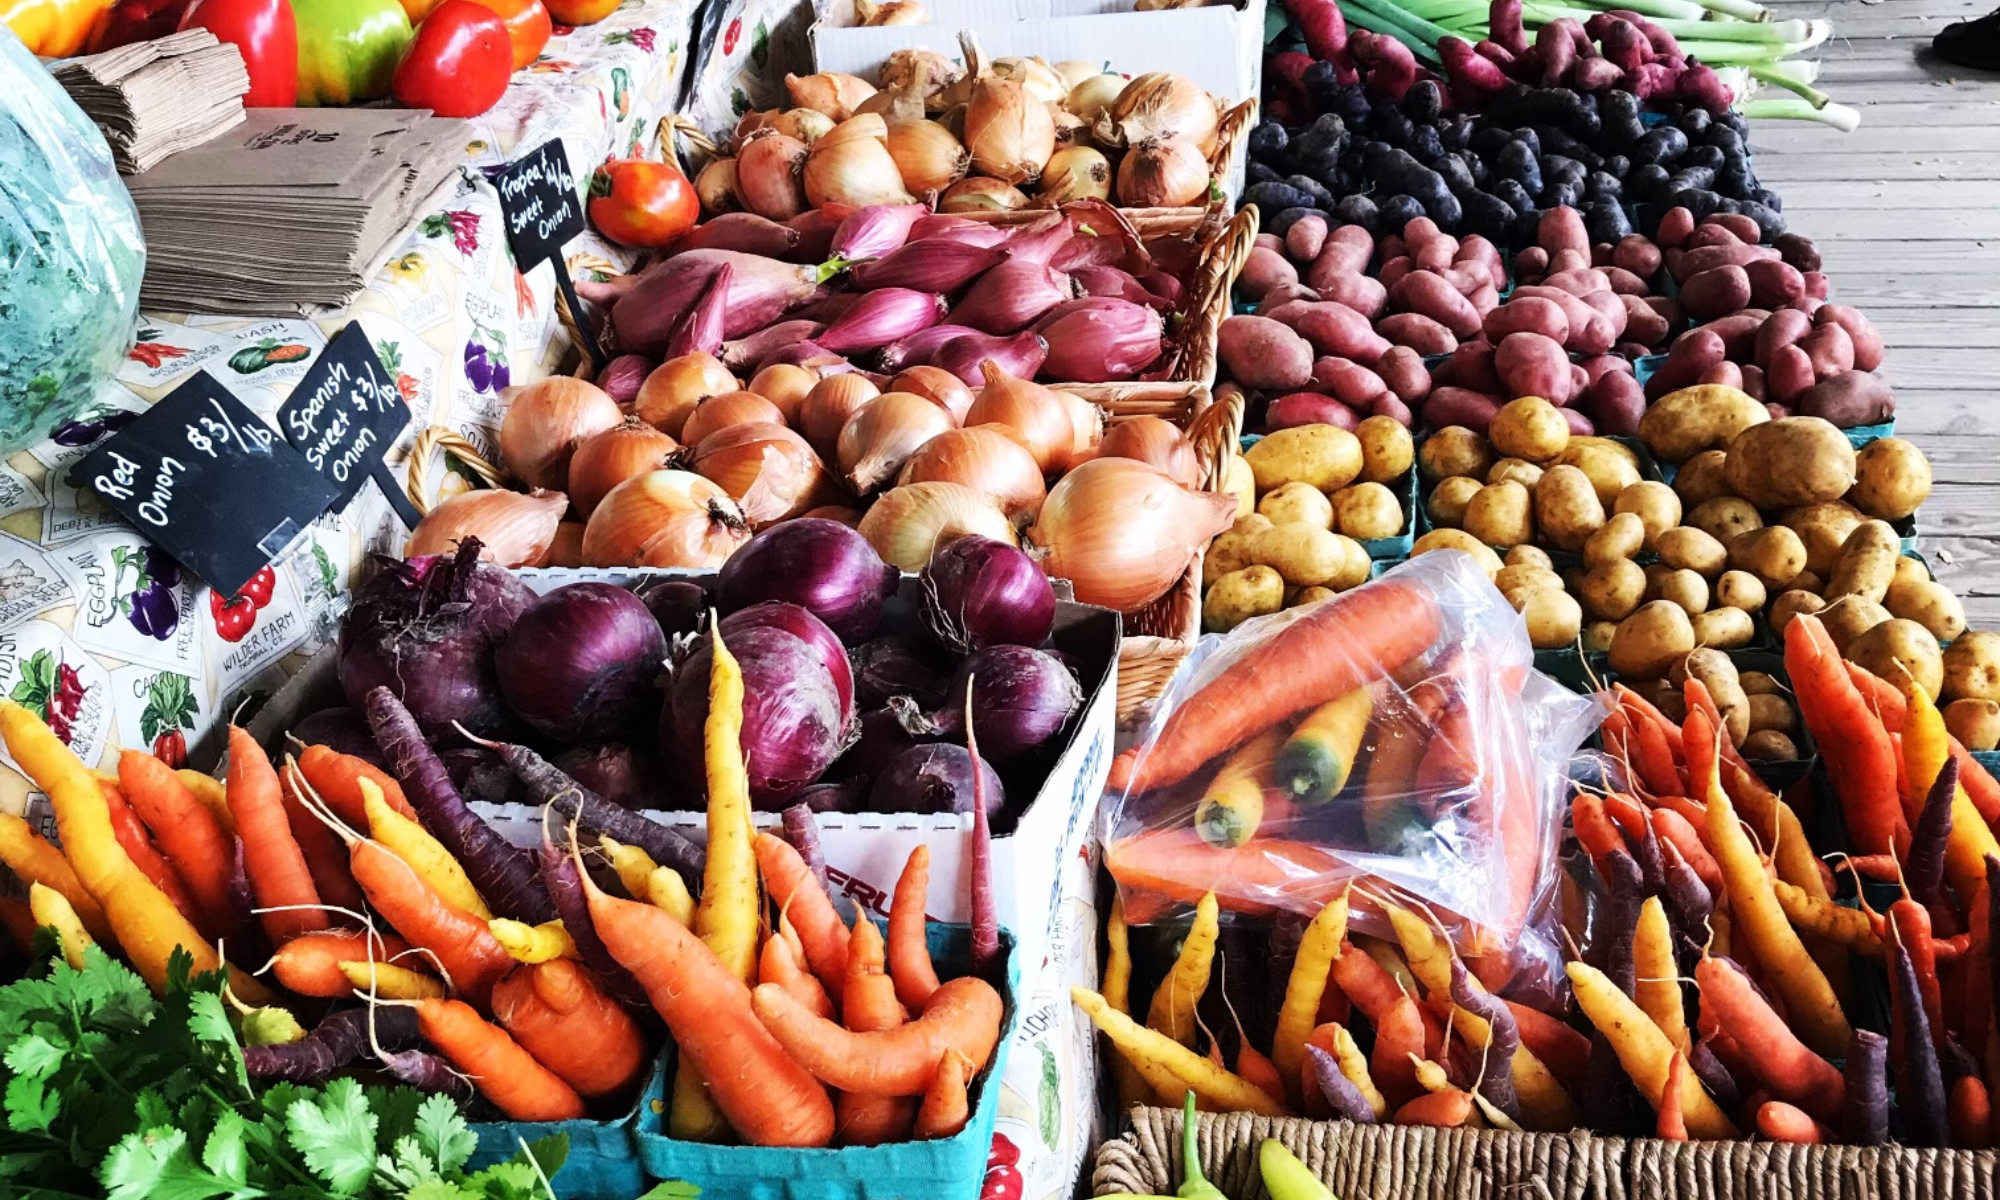
Rainbow Carrots & Purple Pairing

Rainbow Carrots!? Do they all taste like regular carrots?

At any given market we could field this question a hundred times.!

Carrots have a long and interesting history, but there isn’t time for getting into that during a typical market exchange. 

And what  most people asking the question care about is the flavor and nutrition of these well known roots.

All the colors of carrots do taste like carrots in one way or another.

Yellow is by far the sweetest.

Orange has that classic carrot flavor with a sweet depth that only careful, small scale farming can produce.

Purple range ones have hints of the carrot’s  well know sweetness with some rich, earthy undertones.

Pairing Purple

My advice to people curious about these colorful roots is be adventurous.

Buy a bunch or pint of rainbow carrots and try some! 

The other other big difference is that the pigment of the orange and yellow carrots are well behaved. 

The purples not so much.

The Carrot Museum of the UK is the authority in regard to the story of all things carrot. 

They explain that purple carrots get their pigment from anthocyanins.

These pigments act as powerful antioxidants that protect key cell components,  grabbing and holding on to harmful free radicals in the body. 

Anthocyanins also been noted in helping prevent heart disease by slowing blood clotting and are good anti inflammatory agents.

But unfortunately it also has the power color your meals in an “off” sort of way.

Be warned that most people won’t find the dispersed version of this powerful pigment all that appealing if you get too adventurous in the kitchen.

I’ve had my share of blueish,  purplish,  or gray tinted  meals because as a small farm with a big family to feed I often use what’s around to cook with. 

But it’s not always the ideal pairing for picture perfect meals. 

So here’s my advice for paring purple carrots.

Enjoy them raw in salads.

Steam them on their own or with other carrots.

Saute them on their own or with other carrots.

Highlight their beauty with half moons,  carrot coins,  create carrot ribbons with a  potato peeler or even create an extra garnish with a microplaner.

Follow these tips and you’ll enjoy delicious colorful meals without the culinary drawbacks from the strong pigments.

Tag  us in your rainbow carrot Instagram  posts @humblehillfarm  , looking forward to seeing what you create!


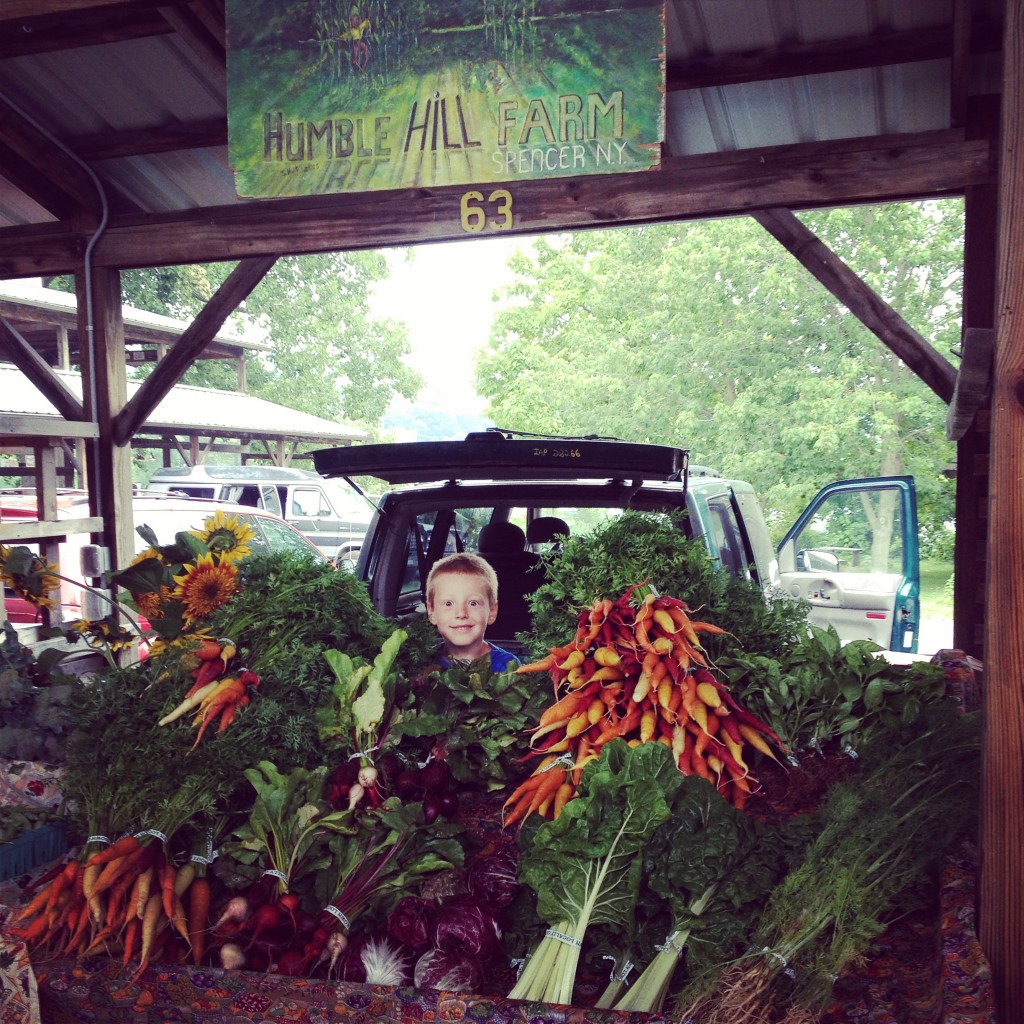
Is Humble Hill Farm Organic? and Other FAQ’s

IMG_8018Is Humble Hill Farm Organic?
The short answer is no, Humble Hill Farm is not a USDA certified organic farm. However like many small farmers we do farm in accordance with their standards. We choose to spend the time and money that record keeping for certification would require on our family.

“If you aren’t a certified farm and you’re clearly not a conventional farm, then what kind of farm are you?”
We’re a chemical free, small scale vegetable farm that produces a large variety of food on several acres of land. At this time we don’t have a certification of any kind because we know our customers and they know us, we don’t see the need for one right now.

We believe in transparency and have an open farm policy. If any of our customers ever want to see exactly how we grow food, they’re welcome to come out at anytime to see for themselves. We only use products that are listed with Organic Materials Review Institute or OMRI Listed® as it’s know in the industry.

What do you use for fertilizer?
We rely on the natural fertility of compost and cover crops for fertilizer. Much of the land we farm is reclaimed farm land meaning it takes a lot of building up before it produces delicious food. We will occasionally use OMRI Listed® Fertrell Certifiable Organic Fertilizers if the site requires it.

What do you use for pest control?
We know our fields. The small scale nature of our farm allows us to keep a careful eye on our crops. We use the power of observation to spot problems early often controlling bugs by removing them manually into a bucket of soapy water. Most of our issues are with young brassicas and we’ve found using row covers to be really successful strategy for preventing damage.

Do you ever spray? On the rare occasions when problems occur and we must spray we only use products that are approved for use on certified farms and OMRI Listed® .

The two we have used most are:
Surround– a clay based spray that coats fruits and leaves.
Pyganic on some baby brassicas

Do you use herbicides?
No, never. We hand weed or hoe our plots and occasionally we bust out the flame weeded if the timing and weather is just right.

“Why do your vegetables taste so good? Is it the varieties you grow?”
One of our main goals here at Humble Hill is to grow flavorful food worth talking about. We pay attention to the mineral levels of our soil and add soil amendments such as Green Sand to keep things rich and well balanced.

Do you use fungicides?
No, never.

Do you have a CSA?Yes we do have Community Supported Agriculture (CSA) shares available. Our Free Choice Farmers Market Share Cards offer maximum flexibility within the CSA model. You shop when you want and you choose what your share will consists of.


How much does a CSA share cost?
Farmers Market Share Cards are sold in $100 increments. 

How does your CSA work? For every $100 purchased, receive $105 worth of your choice of produce at our Farmers Market booth. Each time you shop we simply subtract the total of your purchase from your balance. Credit never expires, shop at your convenience. Find us at Tuesday, Saturday and Sunday Market.

Can I get more than one share?
Yes! You can easily get more than one share. Simply buy more shares as needed at $100 each. 

Where do I pick up my share? 
Farmers Market Share Cards and be used at Ithaca Farmers Market. We sell at Tuesday (downtown) Sat & Sun (on the lake)

Season: Humble Hill Farm has produce available May-Dec (30 weeks) our CSA runs May- December.

What do you grow? A wide range of vegetables rainbow carrots, rainbow beets, many kinds of garlic, onions, shallots, peas, lettuces, cucumbers, beans, pepper both hot & sweet, an assortment potatoes, Asian & assorted greens, squash, melons, broccoli. Fresh herbs( basil, cilantro, parsley and dill. No spray fruits (apples & peaches)


Please send any questions you may have about Humble Hill Farm to info@humblehill.com

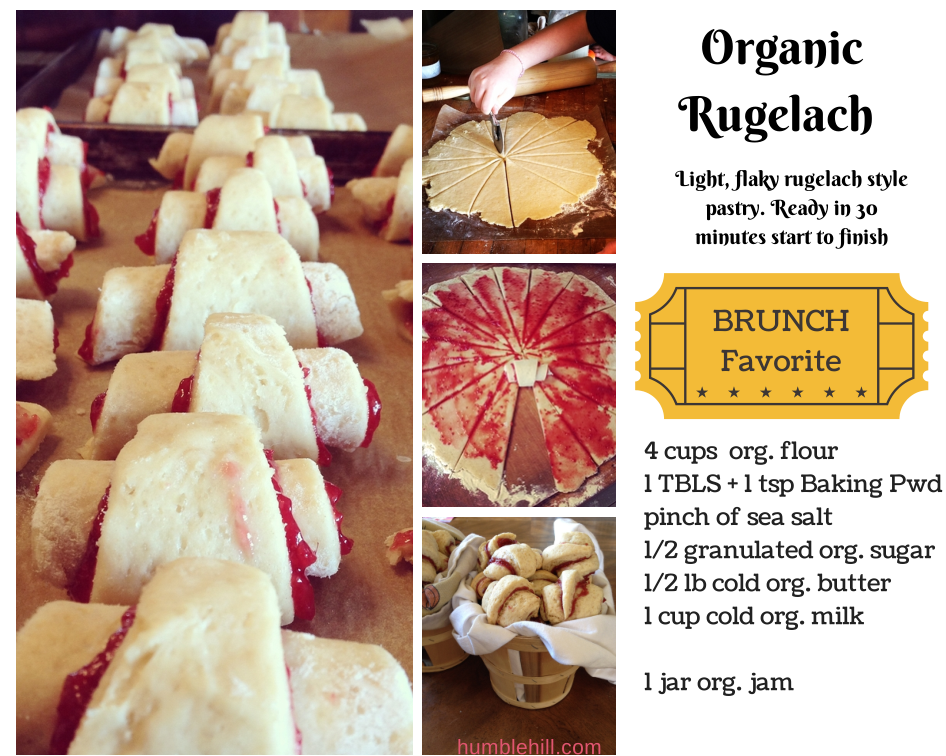
Organic Rugelach-Brunch Favorite

rugelach greatpin
These delicious, flaky pastries can be enjoyed with brunch, tea, or anytime you’re looking for a snack that satisfies. You might be thinking pastries are too time consuming to make and most of the time you’d be right; but these come together in minutes. Make them once and you’ll be hooked. 30 minutes start to finish. You can do it, thank me later.

Essential tools:
Food processor
2 sheets of parchment paper

4 cups cold unbleached, organic white flour
1tbls + 1tsp Baking Powder
Pinch of sea salt
1/2 cup of organic granulated sugar of some kind

1/2 pound of cold, organic butter cubed
1 cup cold local milk

1 jar of organic jam

Measure all dry ingredients into your food processor, add the cubed butter, pulse and or blend for a minute or until the butter has been crumbed into the flour and there are no visible chunks. While the food processor is running drizzle the cup of milk into the swirling flour. Go slow and at the very end it will start coming together as a dough which makes a ruckus. Just keep an eye on the process, then end result should be a dough that isn’t sticky. So long enough that it forms a dough, but don’t mix for long after the ruckus starts about a minute.
The dough doesn’t have to be chilled, but work quickly.

Remove half of the dough, place it in the center of a piece lightly floured parchment paper or non-stick rolling mat. Form a round shape and slowly press it down into a puck shape, sprinkle with flour, place another sheet of parchment paper over the dough and do your best to rolling the dough out to a uniform circle about 1/3 of and inch thick. Remove the top layer of parchment and use a pizza cutter (or a knife) and cut 16 slices. Quickly do that by cutting the circle in half, then quarters, and so on till you have 16 wedges.

Spread the dough with a layer of your favorite jam. Next roll each piece up from the widest edge to the tip. Place the rolled rugelach on to a baking sheet (greased or parchment paper lined). Place the sheets on the center rack of your oven and bake for 16 min at 350 degrees or until bottoms are browned.

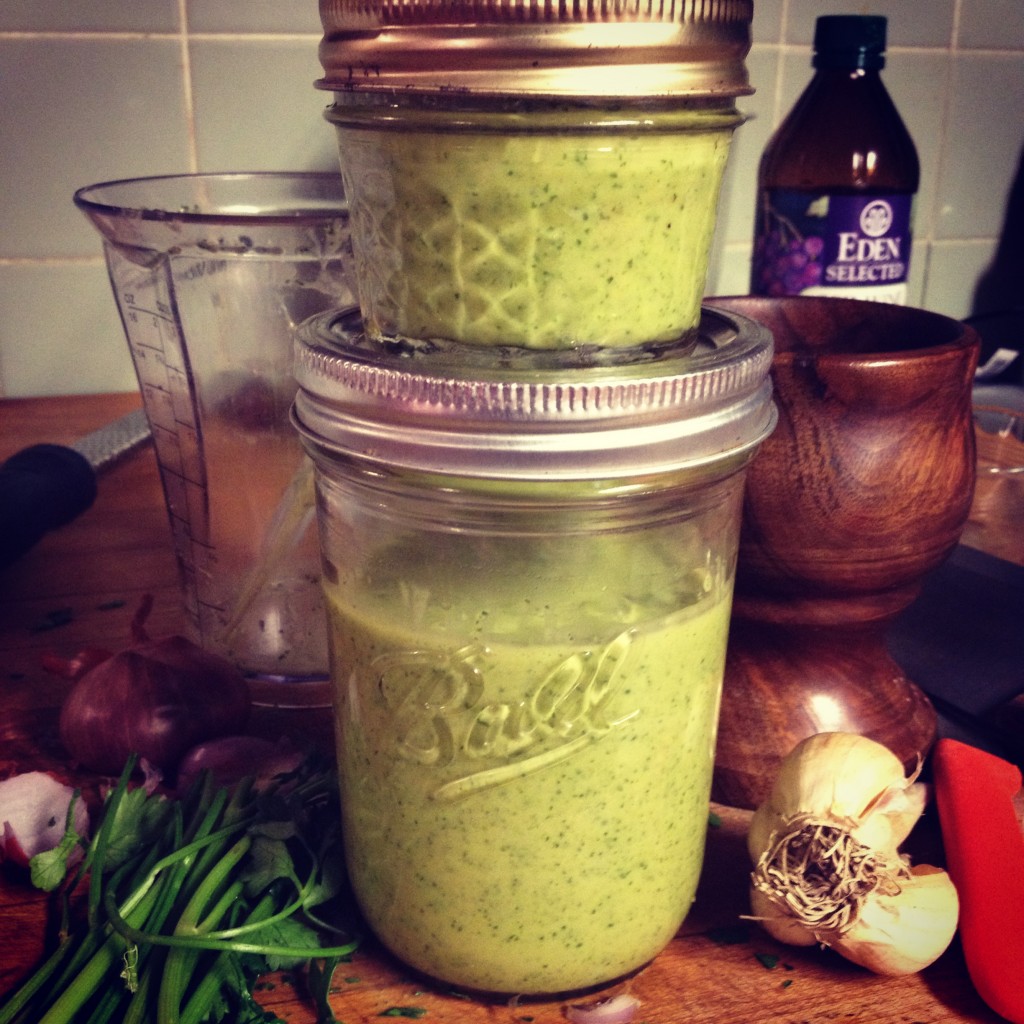
Winter Parsley Dressing

IMG_4694

Finding enough fresh greens in the winter isn’t always easy, but usually a healthy looking bunch of parsley can be found. This dressing is a quick way to add some fresh greens to a simple meal.

2/3 cup olive oil

1/3 cup + 1 splash of red wine vinegar

A bit shy of a 1/4 cup of water

1 teaspoon sea salt

1 small shallot, diced

1 small garlic clove, shredded

1/3 cup chopped parsley, packed

This recipe can be mixed low tech style in a mason jar by hand or high tech with a blender of some sort; both are tasty, but the hand mixed one is obviously going to be chunkier in texture.

Measure out the oil, vinegar, salt, lemon oil, and water into either your blender or jar.

Wash and finely chop the parsley, peel and finely dice the shallot, and peel and finely dice or shred the garlic add all ingredients these to your liquid mix. Blend all ingredients together with your blender or cap your jar shake. Enjoy!

Baking Bread-A Smart Beginner Recipe

20140113-002959.jpg

Many of you have asked for Farmhouse Kitchen's homemade bread recipe, so here it is! This is my standard sandwich bread, dinner rolls and with a wee bit of adjusting it becomes our pizza crust recipe. I make this bread often, honestly it's nothing fancy. This is a great recipe for smart beginners to enjoy the learning curve of baking fresh bread. This bread should be consumed within a couple of days to keep its peak flavor and texture.

Baking bread is a bit easier if you have a mixer. However I baked bread and homemade pizzas for years without a mixer, so don't let the lack of a mixer keep you from trying to bake bread.

Bread Baking Mindset
Baking simple breads at home isn't hard, but it does take time. If you're ready to try your hand at baking bread I really encourage you to check out some of the many wonderful bread baking books from your local library. Read through them like you would read
a novel, it really helps you understand the chemistry side of bread baking. Reading through the notes and specific bread science lessons was very valuable to me in the early days.
There's a bit of a learning curve on figuring out how best to fit baking bread into your lifestyle.
You need to get to know what makes your new friend thrive!
Bread likes warmth. The little things like the temperature of the water that receivies the sleeping yeast, the temperature of your flour, and the temperature of the room where the dough rises are all important. Warmth = Happiness for your dough.

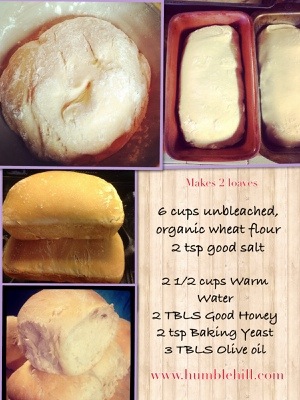
Makes 2 loaves
Simple recipe is:
Dry Ingredients Mix:
6 cups of unbleached, organic wheat flour other wise known as white flour
2 tsp good quality salt

Wet Ingredients Mix:
2 Tbls good quality honey
2 1/2 cups of warm water
2 tsp baking yeast
2 TBLS olive oil or organic canola oil

The Process:
I begin with setting up the wet ingredients first.
The recipe calls for 2 1/2 cups of warm water. Temperature is very important. Think very warm bathtub water, not scalding, but your wrist/finger isn't staying in super long. It's hot – 114degrees is ideal. I usually heat up a bit over 1 cup of water in a small sauce pan bringing it almost to a boil. Then I add this very hot water to a glass measuring cup, add the honey, mix and dissolve.Then add the rest of the water – about a cup and a half of cold to balance it out and it will make 2 1/2 cups of warm water that feels like the right temperature. Over time this temperature alchemy will become second nature.
Once the water is just right you will add 2 tsp active baking yeast to this warm, sweet mixture. The yeast is awakened by the warm water and it feeds off the honey. In ten minutes it will become a frothy, foamy slurry. Only mix this mixture when you first add the yeast, let it do its thing after the initial add & stirring.

Wait to add the oil that is one wet ingredient that gets added later .

Once you have your wet ingredients mixed, set them aside and let the yeast awaken. Next measure out the dry ingredients, grease the pans, and find the clean linens you'll need to cover the rising dough.
Get your bread hook attachment hooked up, add your dry ingredients to the mixers bowl and raise the bowl into place. Double check that your splash guard and funnel are lined up correctly, make sure your bowl is snapped into place and turn the mixer on.
I add the frothy yeast mixture to the running mixer and then quickly add my oil right as the dough is forming.

If you don't have a mixer

Simply measure out the dry ingredients into a large bowl, mix them together and then hollow out a hole in the center of the flour. Add your wet ingredients to this crater and slowly with a fork begin to incorporate the flour along the rim of your crater. As you do this the wet area expands eventually coming together as a nice ball of dough.

The dough shouldn't be too wet or too stiff and dry. This is one of those things you just get used to over time the more you bake.

Keep some extra flour near by to fix the consistency if needed.

Place the dough in a bowl, cover with a clean linen and set it in a warm place to rise. If you have a wood stove be careful not to put it too close to the stove, this will dry out the dough and accelerate rising.

Let it rise till doubled in size (about 90 minutes)

.

Shaping the Loaves
Dough likes to be handled very gently, divide it in half and shape each one into a loaf.
I hold the dough in the air as I shape the loaves. I mould the dough into a long rectangle and then roll it upward. I pinch the bottom seam and do the same for each end and tuck it under the loaf to make a pretty shaped loaf and place it in a greased bread pan.

Repeat for the next loaf and then let the dough rise again, covering the pans with a linen towel for about 30 minutes till they look really nice and fluffy.

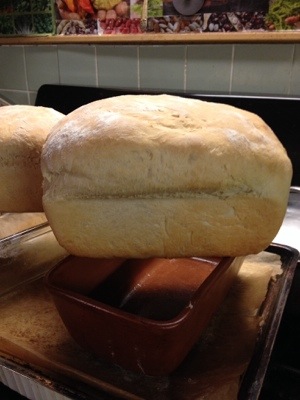
Place them into a preheated 350 degree oven and bake for about 45 min.

As soon as you can handle them, remove the loaves from the pans to cool otherwise they will sweat in the pans as they cool.

The larger version Makes 3 loaves or 2 loaves & 12 small rolls or 6 large ones

Simple recipe is:
Dry Ingredients Mix:
9 cups of unbleached, organic wheat flour other wise known as white flour
1 TBL good quality salt

Wet Ingredients Mix:
3 TBLS good quality honey
3 3/4 cups of warm water
1TBL baking yeast
4 TBLS olive oil or organic canola oil

Strategic Kitchen Tip
If you hope to have some bread on hand for the following day try to time your baking so the hot bread isn't ready when everyone is super hungry!

Have fun with it and be sure to comment below and share your success!
20140113-004431.jpg

20140113-005024.jpg

How To Use Netflix To Learn Everything You Must Know About The Food Supply In A Weekend

Have you ever felt overwhelmed by how much there is to learn about our food supply? Harness the power of Netflix to make the process easier on yourself. There’s a lot of good news despite the severity of the bad news about the industrial food supply. For a crash course in all things food check out these 10 informative documentaries. In one cold weekend you can easily learn more about the food you are eating everyday, see where it’s coming from and why.

image

With this movie list you can head over to Netflix and learn just about everything you need to know about our nations most pressing food issues in a weekend.

Food Inc. is one of my most beloved food movies because they go in hard with facts to the heart of what’s wrong with our food supply.There is no fluff in the entire movie, and they share the the many levels of truth about real cost of cheap food. This is not a light movie, you will laugh, be outraged and especially if you are a parent, you may cry. The environmental toll our current agriculturally food system has on both the external and the internal environment is astounding. I recommend watching it at least three times this winter. Yes, really three times! The reason I make that recommendation is because the content in the movies is overwhelming in its scope. Rather than watching it once and risking the possibility of going into overwhelm, or ridicule. Watch it again to push through any opposition, then the third time you will be prepared to fully accept its documentation of our current food supply issues and create a game plan for staying healthy and finding high quality food to nourish your family.

Genetic Roulette– If you want to know the health science of what’s going on with GMO’s in regard to human and animal health. This film will help ground you in such a way that you will never have a confused moment about the issue of GMO’s again.

King Corn – This film covers the issue of corn and its foundation in our food supply very well. It’s not a really deep movie in its political motives. Basically this film shines light on the depth of the issues with our industrialized food supply with a slightly bizarre innocence. Definitely a film worth watching.

Food Stamped– Tackles the issue of whether or not people on food stamps can afford to eat healthy food. Washington policy makers are interviewed and share their experience of living on a food stamp budget while working out the dollar allotments for the program. The main focus of the movie is a food educator who eats clean foods as the foundation of her own personal diet normally. She embarks on a challenging journey with her partner of eating a healthy, clean foods diet on only a food stamp budget. Very well done, great movie!

Food Fight– This movie is a short but powerful window into the reality of the fight we have at a policy level for funding, the roots of the processed foods industry and original movers and shakers in the fight for clean food. It details the deeds of the misguided politicians and special interests that corrupt the reform of the food bill and keep governmental funding in the form of subsidies flowing towards foods that keep people unhealthy. Throughout is an inspiring narrative about people who are making a real difference and demanding change by showing it can be done on a small scale. With their success they’re seeking to hold the government accountable for funding foods that support health. Very inspiring movie, I highly recommend it!

Ingredients– This movie shares the roots of the local foods movement from the lens of the pioneering chef driven locally grown foods movement. The chefs were in search of the best, most flavorful ingredients. It’s also a tale of innovation, trust, changing the food culture, the roots of the local foods movement and the love of soil. It also sheds light on the loss of farmers, the loss of farmland on which to grow food ,suburban sprawl and land use issues.

Farmageddon – An eye opening look at the state of the methods that are being used to keep the local foods movement in distress. There is big money in clean food and those who don’t produce a quality clean product don’t want farmers drawing attention to the state of food today. This is a very important movie, everyone who eats needs to watch it.

Food Matters-Tackles the issue of how deeply connected what types of food we consume and our overall state of health are .Highlights the profit motives for keeping people ignorant about true wellness in order to have a steady client base for the medical system. They are raising many question about food and health matters and we should too.

The Real Dirt on Farmer John– This is a lighter film about food in some regards, but it tells the story of triumph, salvation and renewal of the family farm to a sustainable model with a big heart. Excellent movie with a touching story, wonderfully highlights the history of the American family farm!

FRESH -Wrapping up the weighty post with the movie that best illustrates the good news about food! Highlights some of the most innovative, go getters solutions driven farmers and food pioneers in America! I love this movie! Uplifting and positive! Solutions abound, are you ready to change the food supply? Great because this movie highlight folks who are already doing it! If you ever get depressed about food supply issues this film is for you!

We’re just getting started, consider this my top ten foodflix picks. There are more movies on this important subject and several more in production. As a small scale food producer I want to take a moment thank you for your interest in the local food movement. Purchasing high quality, local, nutrient dense foods is an investment that goes way beyond your personal plate. Your choices are making a difference, and you’re helping to pave the way for healthy food for all.

Share which of the above movies made your favorites list in the comments below.


Carob Celebration Cake

When winters icy grip takes hold come in from the cold and celebrate the crowning of the year with cake!

This is a recipe that has stood the test of time. It is one of the earliest cake recipes in our archives. I discovered this recipe while in high school and quickly penned it into my trusty spiral bound notebook which at the time was the keeper of all my culinary dreams. The fact that I still have that ratty old notebook and have never transcribed any of the knowledge within its pages is a testament to two things. Number one is that I’ve been into healthy cooking since 1991 and the hustle to figure out how to make desserts free from refined sugar was so intense that I still treasure and hold tight to that early, foundational knowledge. Number two is that the pace of motherhood and farm life over the last 16 years has been very intense!

This is one of the most decadent cakes that we make here in the Farmhouse Kitchen. It’s reserved for special occasions and days when you just need to honor the journey. Back in the days before Humble Hill I used to sell a version of this cake to a local café in Woodstock. One day I packed up my cake and apple pie for delivery as usual and went into town to make the exchange, they got their desserts and I got cash. When I arrived the employee who greeted me shared that there was no payment on hand today and I could just leave the desserts and get paid next week. The promise of payment was not enough to convince me to leave my consumable products in a fledging coffee shop, so I stacked up my boxes and left. I wasn’t really sure what my next move was going to be, but awkward boxes and all I decided to make one quick stop at a bead shop. I was quite a sight walking in there with a big carob cake and an apple pie, so naturally the manager asked me what was up with the boxes and I told him my story. After he grilled me about what types of ingredients were in my desserts he offered to buy some of each. I thought it was a bit strange, until he explained that he’d been working down there for while and had grown tired of all his lunch options. Since I had no other plan and needed gas money to get home I agreed to sell him some slices off of each one. Over time we developed a relationship centered around our love of food and eventually the manager of the bead shop became my husband.

Carob Celebration Cake!

Wet ingredients:
1 cup of water
1 cup of honey (see variations below)
1/2 cup of oil (canola, safflower or olive)
1 tsp vanilla
1 tsp vinegar

Dry ingredients:
2 cups of organic unbleached white flour
3/4 cup of carob powder
2 Tablespoons Dani~Blend (herbal coffee substitute)
1 Tablespoon Baking Powder
1 tsp Baking soda

Preheat your oven to 350 degrees.
In a large bowl combine the liquid ingredients and whip with a whisk until well mixed. Sift the dry ingredient mixture into the liquid mixture and mix everything together into a smooth batter. Pour into a greased cake pan or cupcake tins. Cupcakes baking time is 16-20 minutes depending on their size. The cake bakes for about 25-30 min depending on the size of the pan. Cool cake completely before removing it from the pan. Let cupcakes cool for a few minutes and then remove them from the tins so they cool completely.

Recipe Variations:

Substitute the oil:
Substitute 1/2 of oil with a 1/2 cup of applesauce or you can do half oil half apple sauce totaling 1/2 cup of liquid.

Cut the honey!
Reduce the amount of honey to 1/2 cup and add a 1/2 cup of milk or other liquid to total 1 cup.

Check out Farmhouse Kitchen TV


Farmhouse Kitchen Pancakes

20130405-113145.jpg
These light and fluffy cinnamon pancakes are a sure fire way to please a hungry crowd! This simple recipe goes together in minutes they’re always a big hit in the Farmhouse Kitchen. Pancakes are also fantastic way to whip up a delicious (and cheap) dinner or snack on the fly. A tasty solution for those times when you find yourself without a plan or when you need something special for spontaneous hospitality.

If you’re using a cast iron skillet preheat it on med-low heat while you mix up the batter.
Pancakes For A Crowd
Serves 8

Dry ingredients:
3 Cups unbleached white flour
3/4 teaspoon sea salt
2 Tablespoons of Rumford baking powder
1 teaspoon cinnamon

Wet ingredients:
3 cups of local milk or 3 cups of Rice milk + 2 teaspoons of vinegar (rice or apple)
2 tablespoons organic canola oil
2 tablespoons of either maple syrup, honey or cane sugar

In a medium bowl mix all the dry ingredients.

In another small bowl or large measuring cup combine the wet ingredients together.

Add the wet mixture to the dry and mix it together with a whisk till you have a nice smooth batter. The consistency of a good pancake batter is not too thick, pours well, yet it’s not too runny so it holds it shape on the griddle.

An individual 1/2 cup measuring cup works well for pouring the batter on to the griddle and makes a nice size pancake. Or fill up a large measuring cup and pour the batter on to the griddle directly if your pan is on the smaller side, use a 1/4 cup measuring cup to pour your batter.

Heat up your pan or skillet to medium heat and coat with a little oil. Pour 1/2 or 1/4 cups of batter on to the hot griddle. Cook until you see bubbles pop through the surface of the pancake, around 2 to 3 minutes. Flip the pancakes and cook them till they are done on that side about 1 to 2 minutes.

Serve hot with you favorite toppings.

For pancakes on the go make up a double batch. These pancakes freeze well and thaw nicely in the toaster. If you do make sure to double the sweetener in the wet ingredients, there much less mess on- the- go when the sticky sweetness is on the inside.

How To Make Coleslaw Your Kids Will Love!

the best coleslaw picmonkey


During the long cold winter months and into early spring fresh, local salad greens can be hard to come by. The greens you do find will at premium prices, and rightly so, winter farming is tricky business. Coleslaw is an affordable way to get a raw salad on the table that your kids will love.


The veggies:
1/2 a medium sized red cabbage
1/2 a medium sized green cabbage
3 carrots shredded (optional)

Shred cabbage in a food processer with the blade that makes the thinnest slices. Shred carrots with grater if using them.

The sauce:
1/2 a cup of vinegar(apple cider or rice)
1/4 a cup of oil (canola or olive)
2 tablespoons honey
1  1/2 teaspoons salt
2 teaspoons dill
1 teaspoons thyme
1/2 teaspoon garlic powder

Mix all of the above ingredients together in a small bowl then pour the sauce over the shredded cabbage. Mix the dressing around and pound the cabbage just a bit to let the juices out. Then let sit for 1 to 2 hours before serving, if you can get people to wait for that long!

Please leave us a comment below and let us know if your family loves this coleslaw as much as our family does!


No- Mato Sauce- The Tomato Sauce Alternative

I have a confession to make. We don’t do any canning here on Humble Hill Farm. It’s a big project I’ve never had the time or community power to tackle. With so many little ones in the house the combination of huge vats of boiling liquid, glass jars and our concrete floor the scope of the undertaking has always scared me.
It’s definitely on my list of things to learn.

The cost of sugar-free organic tomato sauce has always inspired me to look for other sauces we can enjoy on pizza, pasta dishes, and rice. Here's a delicious sauce that you can easily cook up with local root veggies when tomatoes are out of season.

Be forewarned this is not an exact substitute, stubborn tomato sauce lovers will complain and people who don’t like beets won’t be fooled into eating this.

That being said it tastes wonderful, it’s nutrient rich and it’s an inexpensive sauce that you can easily find the ingredients for in the winter.

20131112-233850.jpg

Farmhouse Kitchen No-Mato Sauce
1/4 olive oil
1 large onion chopped
4 cups peeled, chopped beets
8 cups peeled, chopped carrots of many colors ( if your carrots are local and very fresh peeling isn't necessary.)
2 cloves of garlic
2 quarts of water
1 TBLS of dried Italian seasoning
1Tbls Red wine vinegar ( Eden Foods)
1 TBLS+ 1 tsp sea salt
1 drop Young Living oregano oil (optional)
1 drop Young Living thyme oil (optional)

Cooking
First add the olive oil to you pan on med- low heat add onions and cook for 5-7 min till they're nicely sautéed.
Next add carrots, beets and garlic. Then add the water and bring the whole pot to a boil, lower heat and simmer for 30 min.

<

20131112-235157.jpg

Blending
Purée until smooth with a wand blender. If you don't have a wand blender then to be safe this mixture has to cool almost completely (2+ hours) before blending it in a regular blender. If you don't have a wand blender it might be the best $25 you ever invested in the kitchen.
After blending season to taste and use as you would tomato sauce.

Purée until smooth with a wand blender. If you don't have a wand blender, then to be safe this mixture has to cool almost completely (2+ hours) before blending it in a regular blender. If you don't have a wand blender it might be the best $25 you ever invested in the kitchen.
After blending season to taste and use as you would tomato sauce.

Flavor Tip
After blending when the sauce has cooled for 30 minutes add one drop of 1 drop Young Living oregano oil & 1 drop Young Living thyme oil. To prevent over doing it, add the oils to the pot either over a ladle or in a small bowl of sauce that you then mix right back into the sauce. This way if too many drops come out at once you won't ruin your whole pot of sauce. The addition of the essential oils really takes the flavor to the next level.Known for their cleansing and purifying properties, the addition of Oregano and Thyme essential oil has medicinal benefits as well.

20131112-234427.jpg

Smash Potato Fries- How To Cook Fingerling Potatoes Your Kids Will Love

20131201-085810.jpg

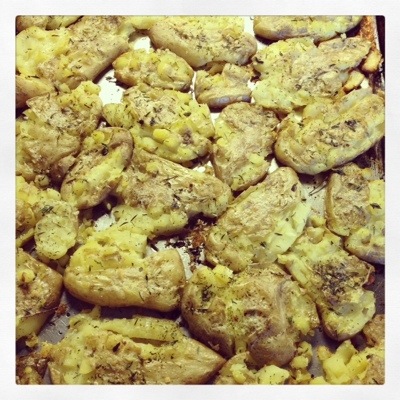
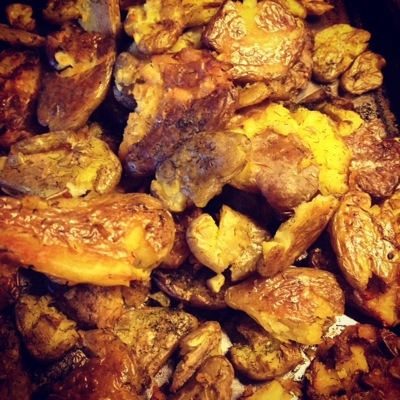
These crispy, crunchy, no peel, no slice, fast & easy smash fries just might be your new favorite way to eat fingerling potatoes.

The Method

Deliciousness in 5 simple steps –wash, boil, smash, season & roast.

The Recipe
2 lbs Fingerling small to medium potatoes
1/3 to 1/2 cup of Organic olive oil
1 1/2 TBLS Sea Salt
1 tsp Frontier All -Purpose seasoning
1/2 to 1 tsp Paprika
1/4 to 1/2 tsp Garlic powder

Wash up your potatoes. This recipe works best when all potatoes are the same size. If some are larger than the others cut them in half to match creating an average size potato.
In your largest pot boil the whole potatoes till soft but not falling apart, about 10-14 min.
Drain & allow them to cool for a few minutes in a colander.
Grease 3 cookie sheets.
Preheat your oven to 450 degrees.
Place slightly cooled potatoes on the greased cookie sheets one at a time. Get a rhythm going as you gently smash each one down with either a potato masher, bottom of a drinking glass or a fork.

Place, smash repeat.

20131201-011647.jpg

Drizzle the smashed potatoes with oil and sprinkle with salt.
Mix the three spices together and sprinkle a bit on each potato, giving each one a delicious dusting of flavor.
Bake at 450 degrees for 20 min, serve hot.

20131201-011758.jpg

If these are a big hit in your kitchen, leave us a comment below we’d love to here what’s cooking at your place.